Showing posts with label DIY. Show all posts

Tuesday, November 13, 2012

Book Baubles

I made these cute little Book Baubles last year for Christmas, but I have left them up year round as nice, INEXPENSIVE, style pieces. 
I wanted to share with you how simple they were to make.
I selected thick paperback books from the thrift store. 
 fold 2 pages at a time.
 2 pages at a time and crease really well. 
Start in the middle of the book. Use 5-ish pages per loop.
You  may have to run a line of hot glue if your loop wont stay tucked. 


Tuesday, October 9, 2012

$1.50 Pumpkin Centerpieces

I picked these up at the thrift store for $1 each (but you may even be able to snag some for cheaper!) 
Spray a light coat of white primer, then clip off the handle.
 Scored this warm beige paint off the "oops" rack at HD for 50 cents.
 Add two coats of beige paint, and fill with an autumn arrangement. 
 
You can turn it towards the face side, or the back depending on your preference. 
You could use autumn branches, fall flowers, dried flowers, or a small potted plant as well to fill your pumpkins. 
If you want to use these outdoors, you might want to put some rocks or something else heavy inside to keep them from blowing away. 

Wednesday, September 26, 2012

Retro Chair Rehab

I have been on the hunt for an amazing desk chair since we put that awesome green one in this room. I wanted to replace the plain ol' black one. Friday, I snatched this one up for $20!
Look at those lines- quick someone get me a typewriter, a steno pad, and one of those pen necklaces Joan wears.
Here it is when we came home. This yellow & orange tweed was a little worse for it's wear, and I was pretty sure there was no foam in the seat. 
So I deconstructed the chair. Removed screws and fabric. Under the back rest, was a beautiful, pristine leather. Under the seat, the upholstery was taped on, and the seat was coated in really old, dry rotted, nasty, foam powder. I scraped it off outside with a mask on (just in case it was toxic). Then I added foam to the back rest and two pieces to the seat. 
Then it got a layer of the awesome orange herringbone fabric. 
It pretty much has made my weekend, I just know I will love it forever!!


Tuesday, September 25, 2012

Ikea Hack: Closet System to Room Divider

So in my original plan for the basement, I planned to hand suspended curtain rods from the ceiling to create a visual wall to cover the storage area. Unfortunately we couldn't find a stud, and supporting a wall of curtains is too much to ask from drywall alone. 
During a trip to Ikea last weekend i stumbled upon the perfect solution!
Stolmen is a closet system where poles are suspended between the ceiling and the floor, and many combinations of poles, drawers, or shelves can be added to customize your space. 
So for my particular needs I just needed a few poles, the joint brackets, and the clothes rails to hang as high as possible. 
I attached the curtains to shower curtain rings from the dollar store on the back. 
If the clothes poles from Ikea are the wrong size for your space, you can use a wooden dowel cut to size with an L bracket screwed to each end.


Tuesday, September 11, 2012

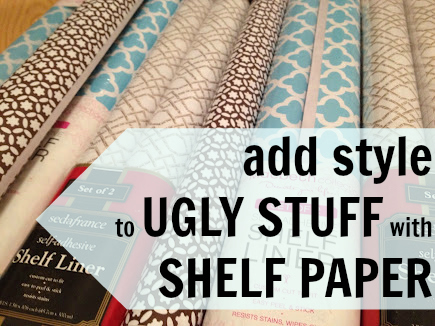
Add style to UGLY stuff...Tuesday Tutorial

]If you have a cat, or a mom with a cat, you probably have a few of these floating around your house... oh no? Is that just me... well, if you stumble across a big kitty litter bucket, you might want to hold onto it because they are infinitely useful.
But, they are unfortunately quite conspicuous and void of style. The label is printed on, so although I could probably use some harsh chemical to dissolve the ink, I'd rather just cover it.

I've collected a mini hoard of (adhesive) shelf paper from TJMaxxes in the last year, but I knew I wanted to save them for a really special project. First measure the areas you want to cover, and cut out corresponding pieces. 
Peel one side and smooth downward while removing the back side of the paper slowly. 
You can use a ruler to help smooth out the bubbles, just make sure it has a soft side so as not to scratch the paper.
Yay! Repeat on all sides.
Feel free to cover up those ugly numbers too. 

What about those ugly plastic drawers that used to be under your bed in college? SO much better with the clutter camouflaged.
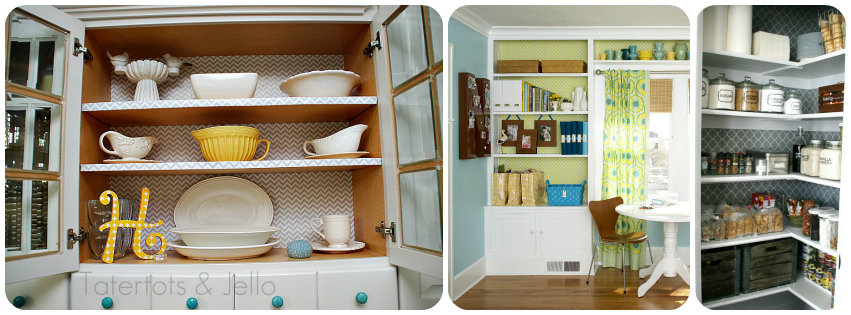
Here are a few other ideas borrowed from Pinterest on using shelf paper to add style. I love it behind these shelves instead of just on them. 
Or on the glass cabinets that you wish weren't transparent. On dresser drawers, or a light switch. 
Even if you can't find the cutesy stuff, the wood veneer kind is readily available. I LOVE the inlayed look created on this filing cabinet. Very modern and playful!

Friday, September 7, 2012

Finally, the end is in sight

Last weekend, we started with a creepy, smelly, mildewy dungeon. 
We added the window AC/Heat unit after we cleaned out the space so that we wouldn't suffocate in the Alabama heat. 
Painting began, what I thought would be two coats of Kilz Clean Start (low VOC primer!!)  
*HELPFUL PAINTING HINT* 
If you need a roller extension for ceilings or high walls, you can use a broom or mop handle. They all twist off, and can then be twisted onto the handle of your roller. 
Coat one, still looks very scary. Uh- Oh... this may take longer than expected.
I ran out of paint part of the way through the 3rd coat. I grabbed a can of white paint I had left over from when we painted my cabinets. Oh surprise! That paint was satin, so I need 1 more coat of paint.... ugh
While I was painting, WD ripped out the old rotten door, and replaced it with an exterior door!
What a MAN! 
Then we removed the baseboards, and began to lay the floor. 
More on this hairy process later!
BUT we didn't finish last weekend, so tonight I cracked the whip, and we finally finished the floors. 
I am so proud of my WD, and myself. The room needs one more coat of paint, but I couldn't find my roller outside in the dark, and I was afraid I might find a snake under one of the tarps instead. 
I haven't decided if I am going to leave the room white or paint it a pale mint green.
Right now, I'm liking how fresh and clean it feels, especially since it will be my sewing/painting/styling space.  
Oh and did I mention... the budget for this room was $750... we have only spent $709 (and now this room counts as liveable square footage in our house!)

Tuesday, August 14, 2012

Over the Window Drying Rack


My mom needed a solution for extra drying space in her laundry room. She hangs almost all of her clothes to dry, to keep the colors true and prevent shrinkage. She repurposed this Ikea Grundtal Kitchen shelf in her laundry room as an over the window drying rack. This would also work over a doorway. The multiple bars give you the option of hanging clothes in layers.


The rack also comes with these great little S hooks. These hooks work great for hanging bathing suits, bras, and hosiery. 
The also added curtain rods across the window for another narrow layer of clothes. If you prefer to use your drying rack to drape clothes, you could add another grundtal half way down (but you would not be able to hang long dresses or jeans. )
I also wanted to show you the doggie door my dad built in the laundry room. Their laundry room shares a wall with the garage, so my dad cut a hole through the wall so that the dogs could access the garage.
I painted this cute little doghouse on the wall when I was in middle school.